Category Archives: Condiments and Dips

Our favorite dips and condiments to help spice up your Whole Food meals

Coriander Tahini Dip

Coriander Tahini Dip

Tahini is a wonderful base ingredient for dips. We have been enjoying making many different combinations including this Coriander Tahini Dip. It is great as a dip with sweet potato chips (which we cook in the Air Fryer for a low fat snack) or with raw vegetables.

Ingredients

  • 1 clove garlic, chopped roughly
  • small handful of pinenuts
  • 2 spring onions
  • little pinch of chilli flakes
  • large bunch of fresh coriander
  • sea salt
  • freshly ground black pepper
  • 1 1/2 Tbsp tahini
  • juice of 1/2 a lemon
  • 1/2 tsp cumin powder
  • olive oil
  • handful of pomegranate seeds for garnish (optional)

Directions

  1. Add the garlic, pinenuts, spring onions, chilli flakes, coriander, salt, pepper, tahini, lemon juice, and cumin powder to a blender.
  2. Add 4 Tbsp of olive oil.
  3. Blend to a smooth paste. Add a little more olive oil if it is too thick or not blending well.
  4. Serve garnished with pomegranate seeds.
  5. Delicious as a dip with sweet potato chips or fresh vegetable sticks (eg cucumber or carrot).

Music to go with it…
Listen on Spotify: The Decemberists – Five Songs EP

Coconut Yoghurt

Coconut Yoghurt with Mango and Honey

Since going dairy free I haven’t had any yoghurt, or yoghurt substitutes. I wanted to change my breakfast habit (muesli and yoghurt) before trying any. Recently a friend gave me some culture grains that she uses to make her daily drink of kefir. I decided to use it to make a coconut yoghurt. After some experimentation, I found that you can vary the creaminess of the yoghurt by using coconut milk, coconut cream, or a mix of the two. This is a 50/50 mix, but you can make it more Greek Yoghurt like by adding more coconut cream

Ingredients

  • 200ml coconut milk
  • 200ml coconut cream
  • milk kefir grains (available on Amazon.com)
  • 1 mango
  • 1 tsp honey

Directions

  • Place the coconut milk and coconut cream in a jar. Stir to combine
  • Add the milk kefir grains to the coconut milk
  • Let the coconut milk mixture stand for 12-24 hours for the culture to do its magic
  • Strain the yoghurt through a mesh (I use a sifter) to sift out the kefir grains. Add the grains to a new batch of coconut milk.
  • Place the coconut yoghurt in a bowl in the fridge for 1 hour to cool down. It will also thicken in the fridge.
  • Serve the yoghurt topped with mango and a teaspoon of honey, or use it in a curry (such as a Palak Chicken Curry) to make the dish more creamy

Music to go with it…
Listen on Spotify: Oscar and the Wolf – Entity

Caramelized Onions and Mushrooms

Chicken Burgers, avocado and tahini spread, red onion and mushroom in vinegar

This side dish of caramelised onions and mushrooms is great as a topping to vegetarian or other burgers, on top of a steak, or as a side dish to eat on its own with a vegetarian or vegan meal. While this time we made it to top Chicken Burgers, we often eat it next to a pile of sweet potato chips from the Air Fryer with a salad. 

Ingredients

  • 1 large onion, sliced
  • 2 garlic cloves, chopped
  • 6 mini portobello mushrooms, sliced
  • 1 Tbsp good quality red wine vinegar
  • 1/2 tsp dried Italian herbs
  • pinch of sea salt
  • a few grinds of freshly ground black pepper

Directions

  1. Add some coconut oil to a pan
  2. Fry the onions for a couple of minutes until they have softened
  3. Add garlic, herbs, salt and pepper. Fry for 1 minute more until the garlic has also softened
  4. Add vinegar and fry for 1 more minute
  5. Add the mushrooms and fry for 2-3 minutes more until the mushrooms have softened and are cooked to your liking
  6. Use on top of vegetarian or chicken burgers, as a whole food topping for a steak, or as a side dish on its own with a vegetarian or vegan meal

Music to go with it…
Listen on Spotify: Zero 7 – EP3


Avocado Tahini Spread

Tahini Avocado Spread

Chicken burgers are really tasty, but they can also use a little something to spice them up. We made this avocado and tahini spread to top them along with Caramelised Onions and Mushrooms in vinegar. 

This is a variation of a recipe that we also use as a dip for sweet potato chips which we cook in the Air Fryer, and we also used this spread for that as well. It would also be great with raw vegetables used as a dip. 

Ingredients

  • 1 ripe avocado
  • juice of 1 lemon
  • 1 Tbsp tahini
  • 2 garlic cloves
  • 1 large red chilli
  • 5 spring onions
  • 1 tsp cumin seeds
  • 1 tsp ground coriander
  • 1/2 tsp salt
  • a few grinds of freshly ground black pepper
  • olive oil

Directions

  1. Put everything in a blender add around 4 Tbsp of olive oil
  2. Blend until smooth.
  3. Add a little more olive oil if the mixture is too thick or does not blend well
  4. Serve as a topping on Chicken Burgers, as a dip with Sweet Potato Chips cooked in the Air Fryer, or use as a spread for savoury dishes.

Music to go with it…
Listen on Spotify: Netorare Fan Club – Make Believe


Desiccated Coconut Milk

Desiccated Coconut Milk

Recently for some strange reason we could not find any of the brand of coconut milk that we normally buy. It seemed to be sold out of all of the shops near our home. We looked at the labels of a lot of other brands of coconut milk, but were not happy with what we saw. In addition to a stabilizer, many had preservatives in them, and some other ingredients we didn’t understand.

Around the same time we ended up buying a whole pile of desiccated coconut on a shopping trip to the Indian wholesaler only to find when we got home that we already had quite a lot sitting at the back of the cupboard. OK, so let’s try combining the two and making our own coconut milk! Actually it is pretty simple, and using a blender it is also very fast. No more preservatives or stabilizers in this lot!

This recipe makes both thick and thin coconut milk, in the two presses of the coconut. I recommend that you press them into separate bowls and retain them separately for use in different recipes. The thick coconut milk can be used to replace cream, while the thin coconut milk can be used as a milk replacement in many dishes.

Ingredients

  • 180g desiccated (shredded) coconut
  • 1.25L hot water (5 cups)

Directions

  1. Put the desiccated coconut and half of the water (625ml / 2 1/2 cups) of hot water into a blender.
  2. Blend on high speed for 30 seconds.
  3. Pour the water and coconut mixture out over a fine sieve or a piece of muslin cloth (you could also use a fine tea cloth) with a bowl underneath.
  4. Squeeze all of the excess moisture out by squeezing the coconut in the cloth, or by pressing the coconut with the back of a spoon in the sieve.
  5. This first press of the coconut mixture will be thicker and creamier than the second press of the coconut mixture.
  6. Return the coconut to the blender and put the rest of the hot water in with it (625ml / 2 1/2 cups).
  7. Blend again on high for for 30 seconds
  8. Pour the second lot of water out over a fine sieve or piece of cloth, and a fresh bowl.
  9. This second press of the coconut mixture will be a thin coconut milk, but will normally be more than the first press of the coconut.
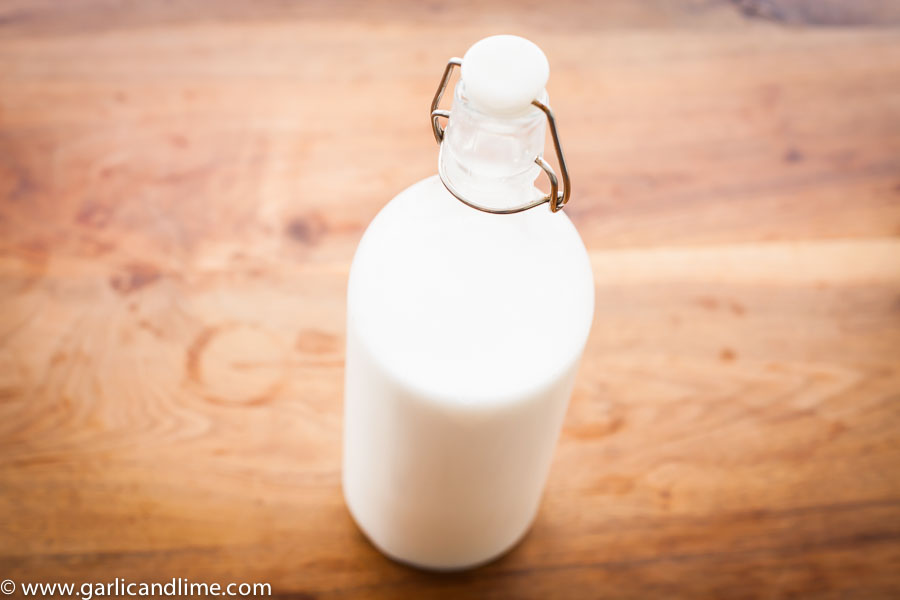
  10. Store the thick and thin coconut mixtures separately in airtight containers in the fridge, and use in soups, curries, or beverages.

Music to go with it…
Listen on Spotify: The Mountain Goats – Beat the Champ

Homemade Carrot Kimchi

Homemade Korean Carrot Kimchi

No Korean meal is complete without a side dish of Kimchi. It is a national obsession, and rightly so. There are many health studies which show the benefits of this fermented wonderfood!

We have a favourite little Korean BBQ restaurant here in Singapore, and they serve a trio of Kimchi’s. This got us investigating what other Kimchi variations we could make, including this carrot Kimchi.

Chopping the carrot finely takes some work, and you could also grate it to save you some time if you like (although then it will look a little less pretty).

Ingredients

  • 1 kg carrots
  • 1 1/2 Tbsp coarse sea salt

Kimchi paste

  • 1 Tbsp gochugaru, Korean chilli powder
  • 50g leek, shredded
  • 1 tsp minced garlic
  • 1 tsp finely grated ginger
  • 100g fresh daikon / mooli radish, coarsely grated or finely sliced (can be substituted for regular radish, but decrease the amount as it is stronger in flavour)
  • 1/2 tsp fish sauce
  • 1 Tbsp salt

Directions

  1. Peel the carrots and slice them very finely (Julienne). Place them in a bowl and add the salt. Cover the carrots with water and leave them to stand overnight at room temperature
  2. Taste the carrots to check the seasoning and wash in water until it is just too salty for your taste
  3. A good kimchi contains enough salt, but to get it right it is important to taste it. If it is very salty then you need to rinse it more. Rinse it multiple times, tasting  each time until it is just too salty for your taste. If it tastes salty enough for your taste, then it is probably not salty enough, and you should add more salt to the mixture (2 Tbsp rather than 1 Tbsp) when you are making the Kimchi paste.
  4. Mix together all of the ingredients for the Kimchi paste in a bowl
  5. Add the carrots and mix thoroughly using your hands
  6. Place the carrot Kimchi into a jar or bowl with a tight fitting lid. Press them into the jar to be tight fitting, but do not use any real force in doing so.
  7. Put the kimchi into the fridge and let it stand for 10 days
  8. It will keep for approximately 1 month in the fridge

Music to go with it…
Listen on Spotify: City and Colour – Bring Me Your Love

Homemade Korean Kimchi

Homemade Korean Kimchi

One of our son’s best friends at school is Korean, and his mother was nice enough to give us some Korean gochugaru chilli powder. We had been talking to her about how much we loved Korean food, and that we were keen to try making our own Kimchi. After convincing her to swap a BBQ for a Korean dinner at her place, she decided it was our time to cook next and gifted us the chilli powder to make the much talked about Kimchi.

Kimchi is a fermented vegetable dish, much like sauerkraut, except spicy.  The national dish of Korea (and a national obsession), no Korean meal is complete without it. The fermentation process of making it also makes it great for your gut health and there are many studies on its health benefits.

There is no definitive recipe for Kimchi, rather you can make a lot of variations of the basic recipe. Adding carrot or cucumber are some suggestions to get you started. Enjoy!

Ingredients

  • 2 kg Chinese leaf cabbage
  • 200g sea salt

Kimchi paste

  • 150g gochugaru, Korean Chilli Powder (do not substitute for regular chilli powder as this is more like a paprika powder, with a little chilli added. Regular chilli powder would be far too hot)
  • 300g leek, finely chopped
  • 2 Tbsp garlic, minced
  • 2 Tbsp ginger, finely grated
  • 200g fresh daikon / mooli radish, grate on wide grater, or finely shred (you could substitute for regular radish, but cut it is a little more intense in flavour, so decrease the amount and cut it up finely)
  • 1 Tbsp fish sauce
  • 1-2 Tbsp salt

Directions

  • Cut the Chinese cabbage in half lengthwise to expose all of the leaves. Place the halves cut side up in a bowl. Salt the cabbage layer by layer. You don’t have to be too perfect at this.

Korean Kimchi

  • Place into a large bowl and cover with enough water to completely submerge it. Place a heave object on top to keep the cabbage submerged under water. I used a pestle, but you could use a bowl, plate, or jar as well.
  • Repeat for each of the cabbage halves until you have used up all of the salt and roughly salted all of the cabbage leaves
  • Cover with a tea-towel and let it stand for 24 hours at room temperature in the brine mixture.
  • Drain the water and taste a bit of the cabbage from the middle to check for how salty it has become.
  • A good kimchi contains enough salt, but to get it right it is important to taste it. If it is very salty then you need to rinse it more. Rinse it multiple times, tasting from a middle leaf each time until it is just too salty for your taste. If it tastes salty enough for your taste, then it is probably not salty enough, and you should add more salt to the mixture (2 Tbsp rather than 1 Tbsp) when you are making the kimchi paste.
  • Carefully squeeze the liquid out of the Chinese cabbage
  • Mix together all of the kimchi paste ingredients in a bowl.

Korean Kimchi

  • Either you can leave the cabbage halves still whole, or you can cut the ends off them in order to separate the leaves. I cut the ends off to make it easier to put them into the jar that I had available.
  • Mix the Chinese cabbage and kimchi paste thoroughly with your hands. It will wash off easily, and there isn’t really a good substitute to just getting in there and getting dirty!

Homemade Korean Kimchi

  • If you are leaving the cabbage halves whole, then make sure that you lift the leaves up and press the paste in between them.
  • Place the kimchi into a jar or bowl with a tight fitting lid. Press into the container so that it is tightly packed, but don’t use too much force in doing so. You just want to press it into the container to completely fill it.
  • Leave the kimchi to stand on the bench for 24 hours.
  • Transfer to the fridge and leave it for 7-10 days before you start to eat it.
  • It will last for around 2 months in the fridge.

Music to go with it…
Listen on Spotify: The Very Best – Makes a King

Dukkah (Duqqa)

Dukkah crusted tuna

Dukkah is a classic Middle Eastern blend of spices, seeds and herbs. Originating in Egypt, there is no definitive recipe, with each home and store offering their unique blend. At its most simple it is a blend of mint, salt and pepper. It can be used as a topping for meat such as salmon, tuna or chicken, but can also be used as a dipping for bread (turkish flat bread is a good choice) or vegetables for a crunchy starter.

Ingredients

  • 1/2 tsp Cloves
  • 1 tsp Fennel seeds
  • 1 tsp Coriander seeds
  • 1 tsp Cumin seeds
  • 1 tsp Paprika
  • 1/4 tsp Turmeric
  • 1/2 tsp chili flakes
  • Handful of chopped pine nuts, toasted
  • Handful of chopped almonds, toasted
  • Handful of chopped cashew nuts, toasted
  • 1/2 tbsp White sesame seeds
  • 1/2 tbsp Black sesame seeds
  • 2 tbsp Honey
  • Juice of 1 orange
  • Sea salt
  • Black pepper

Directions

  1. Toast the seeds in a a pan for around 30 seconds or until fragrant.
  2. Transfer the seeds to a spice grinder (or mortar and pestle) and grind until you have a coarse powder.
  3. Transfer to a little bowl, add all other ingredients and mix.
  4. Use as a topping for meat, or with olive oil as a dipping for bread or vegetables

Music to go with it…
Listen on Spotify: Intergalactic Lovers – Little Heavy Burdens

Thai Green Curry Paste

Thai Green Chicken Curry
This is a basic Thai Green Curry paste recipe that can be used as the basis to make Thai green curries with any number of fresh vegetables, chicken or other meats, such as our Thai Pumpkin and Mushroom Curry and Thai Green Chicken Curry.
Ingredients
  • 15 medium green Thai chillies
  • 1 tbsp fresh galangal
  • 2 tbsp lemongrass, finely chopped
  • 1 tbsp zest of kaffir limes, chopped (substitute with zest of regular limes if not available)
  • 2 tbsp scraped and chopped coriander root (from the stems of fresh coriander)
  • 3 tbsp red shallots, chopped
  • 2 tbsp garlic, chopped
  • 1 tsp chopped fresh turmeric
  • 1/2 tsp coriander seeds, roasted and ground
  • 1/2 tsp cumin seeds, roasted and ground
  • 10 white peppercorns
  • 1 tsp shrimp paste (substitute for fermented tofu in brine for a vegetarian / vegan version of this recipe)
Directions
  1. Put all ingredients in a blender – except the shrimp paste – and blend until smooth. You might need to use a little water to get the blending started. Never use oil in your paste!
  2. When the paste is smooth, add the shrimp paste and blend a little more.
  3. Use or store in a glass container in the fridge. Will keep for a few weeks.

Music to go with it…
Listen on Spotify:  Emily Rice – Find Me Here

Homemade Mustard

Homemade mustard

I wanted to make a sweet potato salad with a honey mustard dressing, but in looking at the pots of mustard I started finding a whole pile of ingredients that I didn’t recognize. Thinking it must be possible to make myself, I started exploring making different types of mustard. This is a basic recipe and you can vary it with different types of mustard seeds, and by adding more or less honey to make it sweeter. A little warning, it is quite spicy immediately after you blend it, so beware of using too much too soon.

Ingredients

Directions

  1. Add the mustard seeds, vinegar and water to a jar. Do not cover it, and let it stand on the bench top for 24-48 hours. (If you forget about it, then it is OK to leave it like this for up to a week.)
  2. The mustard seeds should have absorbed most of the water and vinegar before you move to the next step (this might take more or less time depending on your mustard seeds)
  3. Place the mustard seeds mixture, turmeric, salt, and honey into a blender and blend for about 2 minutes. You can blend a shorter or longer time depending on whether you prefer a smooth or more chunky mustard.
  4. Place the mustard into a sealed jar, and put it in the fridge. Let it sit for a couple of days before you eat it, as the taste will mellow and all the flavours will meld together the longer it stands.
  • Note: that the inclusion of the turmeric is only to give it a yellow colour. You can leave it out if you like, and then the mustard will be a beige colour.
  • Note: You can add more honey if you prefer the mustard a little sweeter. Try it first with 2 Tbsp, and add more later after you have let it stand for a couple of days if you prefer.

Music to go with it…
Listen on Spotify: Lower Dens – Escape from Evil